iTunes Match: remove low bitrate files after upgrade
So you now have iTunes Match. Great, this means that on your other devices you get the uploaded songs in the higher bitrate of 256 kbps. But: on your original computer the files are still in the original (lower) bitrate…
There’s a good article on the Macworld site that explains how to replace them with the higher bitrate.
The Macworld tip is nice because it can also remove the low bitrate files for you. But not if you manually add/manage your music. Or, what if you want to keep them in the original location and move/remove them manually?
This article explains how to do that.
Steps
- create smart playlist as in: http://www.macworld.com/article/163620/
- download, double-click and run the script from this article (set the properties in the script for the name of the playlist and the prefix); default values: name of playlist = “iCloud to upgrade”, name of prefix “_iCloudUpgrade_ “
- use the Macworld article to “delete all those files” in iTunes
- use the Macworld article to “bring ’em back” in high bitrate
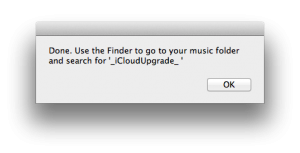
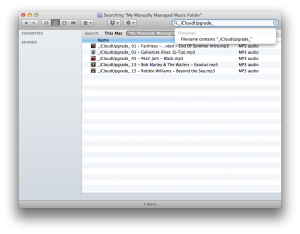
- use Finder, go to your music folder, search for the prefix and then move or delete these files
Download script
[Download not found]Notice
- the script in this article is to be used before you delete the files from your local computer. If you read this article after you upgraded and the low bitrate files are still there, then use the script on Doug’s AppleScript site.
- you only need to use the script in this article if you manually manage your music. If you let iTunes manage it, then it will automatically place the low bitrate file in the Trash as part of the delete process.
Background
When upgrading tracks, iTunes offers to put the original low bitrate files in Trash afterwards. But: only for music managed by iTunes. Music that is manually added is not placed in Trash. How to find these files after the upgrade?
Or, it can be that you want to make a backup of these low-bitrate files, or remove them manually.
Note: if you manage your music manually the high bitrate files will not be placed in the original folder, but in the main iTunes music folder (iTunes > Preferences > Advanced > “iTunes Media folder location”)
The AppleScript on this page will rename these files so you can find and remove them easily.
The filenames are changed, this is harmless and afterwards you can still play the files in iTunes.
If you change your mind, run the script again to undo the renaming process.
Script details
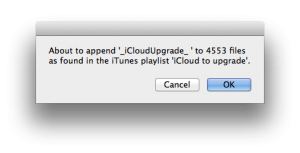
The script will go through all the tracks in the smart playlist that you created, and rename the file by adding a prefix (e.g. “_iCloudUpgrade_ “). After the upgrade you can then use Finder to search for that prefix. Those are the original low bitrate files that have now been replaced in iTunes by the high bitrate version, and you can safely delete (or move) these files.
Screenshots
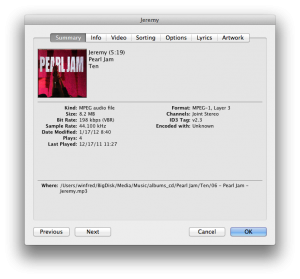
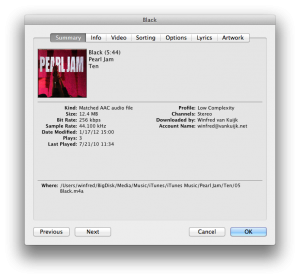
details of before and after
note that after the iTunes Match upgrade:
- the bitrate is different (as expected)
- the location is different (because I manually manage my music)
- your iTunes/iCloud user info is embedded in the high bitrate music file
Script
If you want to take a look at the script instead of / before downloading it, here it is.
property iCloudPlaylist : "iCloud to upgrade"

property iCloudPrefix : "_iCloudUpgrade_ "
tell application "iTunes"
set iCloudTracks to (every track of playlist iCloudPlaylist)
set myCount to (count iCloudTracks)
if myCount is greater than 0 then
display dialog "About to append " & quoted form of iCloudPrefix & " to " & myCount & " files as found in the iTunes playlist " & quoted form of iCloudPlaylist & "."
end if
repeat with myTrack in iCloudTracks
set myFile to (get location of myTrack)
tell application "Finder"
--set myFolder to (container of file myFile)
set oldName to (name of file myFile)
if oldName does not contain iCloudPrefix then
set newName to (iCloudPrefix & oldName)
set name of file myFile to newName
else
-- as a backup: run script again to remove the prefix
set originalDelimiter to AppleScript's text item delimiters
set AppleScript's text item delimiters to iCloudPrefix
set name of file myFile to (text item 2 of oldName)
set AppleScript's text item delimiters to originalDelimiter
end if
end tell -- Finder
end repeat -- all tracks in the special playlist
display dialog "Done. Use the Finder to go to your music folder and search for " & quoted form of iCloudPrefix buttons {"OK"}
end tell -- iTunes
2 Responses to “iTunes Match: remove low bitrate files after upgrade”
Leave a Reply
« Wintec WBT-202 on Apple using Wine | Home | Calculate distance in Google spreadsheet »

The whole point of using iTunes is media management. Manually managing media just seems like such a pointless exercise.
Media management is not the same as file management. I did not want iTunes to delete my original files, so I could back them up, and I did want to be able to identify + find the original files easily.